

Hey there! As a supplier of the Internal Series Dental Handpiece, I'm here to walk you through the process of connecting this amazing piece of equipment to your dental unit. It might seem a bit daunting at first, but trust me, it's not as complicated as it looks.
First things first, let's talk about why the Internal Series Dental Handpiece is such a great choice. This handpiece is designed with precision and efficiency in mind. It offers smooth operation, which is crucial when you're working on a patient's teeth. And its internal design ensures that it can handle a variety of dental procedures with ease. If you're interested in learning more about it, you can check out the Internal Series Dental Handpiece on our website.
Now, let's get into the nitty - gritty of connecting the handpiece to the dental unit.
Step 1: Gather Your Tools and Equipment
Before you start the connection process, make sure you have everything you need. You'll need the Internal Series Dental Handpiece itself, of course. Along with that, you should have the appropriate connectors that come with the dental unit. These connectors are usually color - coded to make the process easier. You might also want to have a clean, dry cloth handy to wipe down any parts before connecting them.

Step 2: Prepare the Dental Unit
The dental unit is the central hub of your dental equipment setup. First, make sure it's turned off. This is an important safety step. You don't want any electrical shocks or unexpected movements while you're connecting the handpiece. Once it's off, locate the ports on the dental unit where the handpiece will be connected. These ports are typically labeled, so it shouldn't be too hard to find them.
Step 3: Check the Handpiece
Take a close look at your Internal Series Dental Handpiece. Inspect it for any visible damage or debris. If you find any dirt or debris, use the clean cloth to gently wipe it away. Make sure the connectors on the handpiece are also clean and free of any corrosion. A damaged handpiece or dirty connectors can lead to poor performance or even cause damage to the dental unit.
Step 4: Connect the Air and Water Lines
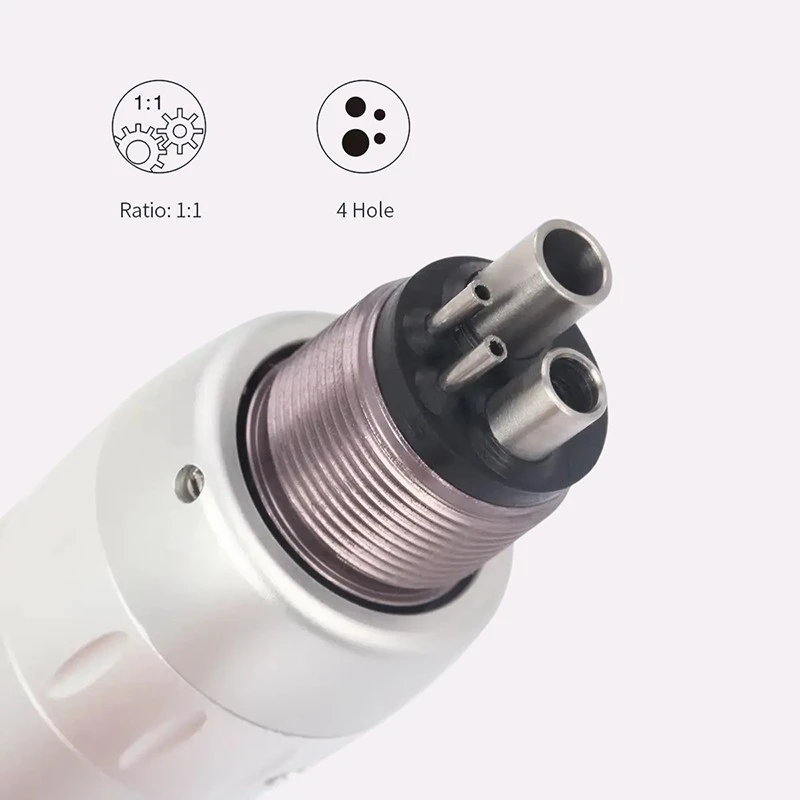
The Internal Series Dental Handpiece requires both air and water to function properly. Most dental units have separate ports for air and water. The air line is used to power the handpiece, while the water line is used to cool the tip during use. Locate the air and water connectors on the handpiece and match them with the corresponding ports on the dental unit. Usually, the air connector is larger and the water connector is smaller. Align them carefully and gently push them into the ports until they click into place.
Step 5: Connect the Electrical Connector (if applicable)
Some Internal Series Dental Handpieces are electrically powered. If your handpiece falls into this category, you'll need to connect the electrical connector. This connector is usually a small, round plug. Find the electrical port on the dental unit, which is often labeled. Insert the plug into the port and make sure it's securely connected. You might need to give it a gentle twist to lock it in place.
Step 6: Test the Connection
Once you've connected all the lines and connectors, it's time to test the connection. Turn on the dental unit. You should hear the handpiece start to make a humming sound, which indicates that the air is flowing properly. Check for water flow by activating the water control on the dental unit. You should see a steady stream of water coming out of the tip of the handpiece. If there are any leaks or if the handpiece doesn't seem to be working correctly, turn off the dental unit immediately and double - check your connections.
Step 7: Make Adjustments (if necessary)
If you notice any issues during the test, such as uneven water flow or a weak air supply, you may need to make some adjustments. You can usually adjust the air and water pressure on the dental unit. Refer to the user manual of your dental unit for instructions on how to make these adjustments. Fine - tuning the pressure can greatly improve the performance of the handpiece.
Additional Considerations
- Compatibility: Make sure that the Internal Series Dental Handpiece is compatible with your dental unit. Different dental units may have different connector types or power requirements.
- Maintenance: Regular maintenance of the handpiece and the connections is essential. Clean the handpiece after each use and periodically check the connectors for any signs of wear or damage.
- Training: If you're new to using dental equipment, it might be a good idea to get some training. Many dental equipment suppliers offer training sessions to help you get the most out of your equipment.
In addition to the Internal Series Dental Handpiece, we also offer other great dental handpieces. For example, if you're looking for a Low Speed Dental External Series Handpiece, we've got you covered. And if you need a reliable Dental Low Speed Handpiece Motor, we can provide that too.
If you're interested in purchasing the Internal Series Dental Handpiece or any of our other products, we'd love to have a chat with you. Our team of experts can answer all your questions and help you find the right equipment for your dental practice. Just reach out to us, and we'll be more than happy to assist you in your procurement process.
References
- Dental Equipment User Manuals
- Industry - standard dental handpiece installation guides
So, there you have it! Connecting an Internal Series Dental Handpiece to a dental unit is a straightforward process as long as you follow these steps. I hope this guide has been helpful to you. If you have any more questions, feel free to ask.